Introduction:
Shell stitch crochet blanket – Crocheting is a timeless craft that not only provides a creative outlet but also yields beautiful, handmade treasures for you and your loved ones. Among the myriad of crochet stitches, the shell stitch stands out as a classic, versatile pattern that adds texture and elegance to any project. If you’re a beginner eager to dive into the world of crochet blankets, mastering the shell stitch is an excellent starting point. This comprehensive guide will walk you through the process step by step, ensuring that by the end, you’ll have crafted a stunning blanket to cherish.
Understanding the Shell Stitch
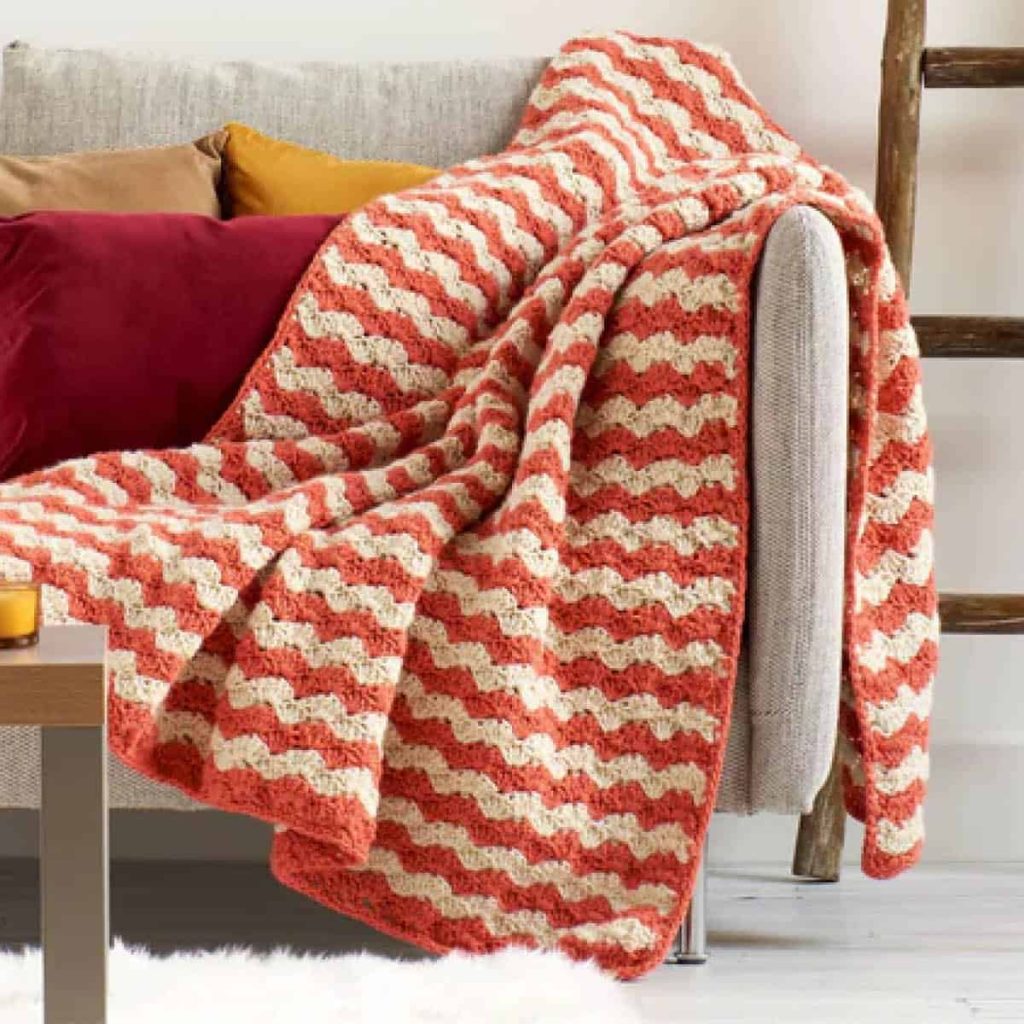
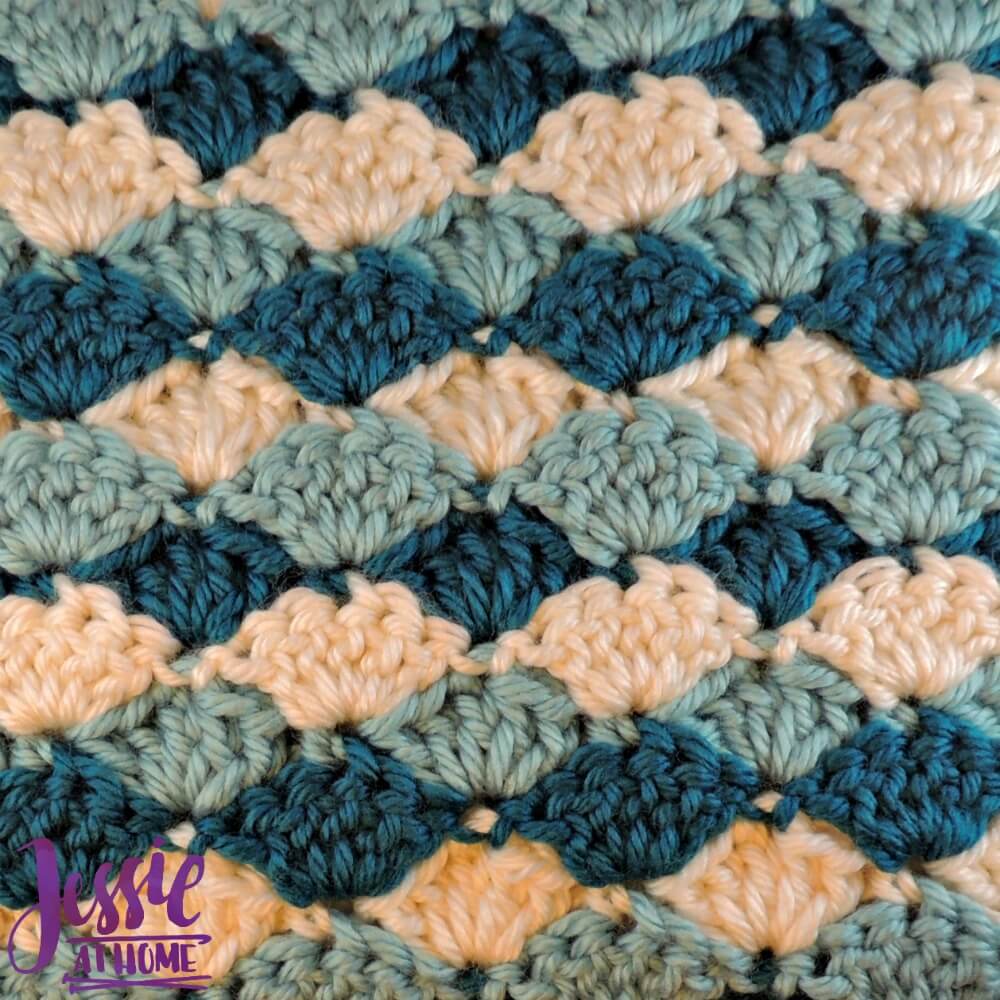
The shell stitch gets its name from the undulating pattern it creates, resembling the ridges of a seashell. It’s composed of a series of stitches worked into the same stitch or space, followed by a chain stitch (or several) to create gaps, then repeating the sequence. This repetition forms a series of interconnected shells that give projects depth and dimension.
Preparing for Your Project
Before picking up your hook, gather your materials:
- Yarn: Choose a soft, easy-to-work-with yarn suitable for blankets. Worsted weight is a popular choice for beginners due to its manageability. Don’t forget to check the yardage; you’ll need enough to complete your desired blanket size.
- Crochet Hook: The recommended hook size will be on your yarn label. For worsted weight, a size H (5.0mm) or I (5.5mm) is common.
- Scissors: For cutting yarn.
- Tapestry Needle: To weave in ends.
- Stitch Markers: Optional but helpful for marking repeats or edges.
Learning the Basics of Crochet
If you’re completely new to crochet, start with these fundamental skills:
- Slip Knot: The starting point for all crochet projects.
- Chain Stitch (ch): Forms the foundation of your work.
- Single Crochet (sc), Double Crochet (dc): Basic stitches often used in shell patterns.
- Reading Patterns: Understand crochet abbreviations and pattern repeats.
The Shell Stitch Pattern
A basic shell stitch pattern might look like this:
- Foundation Chain: Start with a chain that’s a multiple of 6, plus 3 for the turning chain. For example, if you want a small practice swatch, chain 21 (6 x 3 + 3).
- Row 1: dc in 4th ch from hook (skipping 3 chs counts as first dc), [skip next 2 ch, 5 dc in next ch, skip 2 ch, dc in next ch] repeat across, ending with 2 dc in last ch, turn.
- Row 2: ch 3 (counts as first dc), [skip next 2 dc, 5 dc in next dc, skip next 2 dc, dc in next dc] repeat across, ending with 2 dc in top of turning chain, turn.
Repeat Row 2 for the pattern. Remember to count your stitches and ensure consistency across rows.
Tips for Success
- Practice: Start with a small swatch to get comfortable with the stitch before committing to a full blanket.
- Tension: Consistent tension is key to even stitches. Relax and find your rhythm.
- Counting: In shell patterns, it’s easy to lose track. Use stitch markers or count after every row.
- Blocking: Once completed, blocking can help even out stitches and enhance the overall look of your blanket.
Expanding Your Project
To transform your swatch into a blanket, decide on the dimensions. Let’s say you want a baby blanket measuring 30″ x 36″. Estimate the number of chains needed based on your gauge (the number of stitches per inch). Work accordingly, increasing or decreasing the starting chain to fit your desired size.
Finishing Touches
- Border: Add a simple border around your blanket using single crochets or a more decorative edge to frame your work.
- Weaving in Ends: Neatly weave in all loose ends using a tapestry needle.
- Washing & Drying: Follow the care instructions on your yarn label for best results.
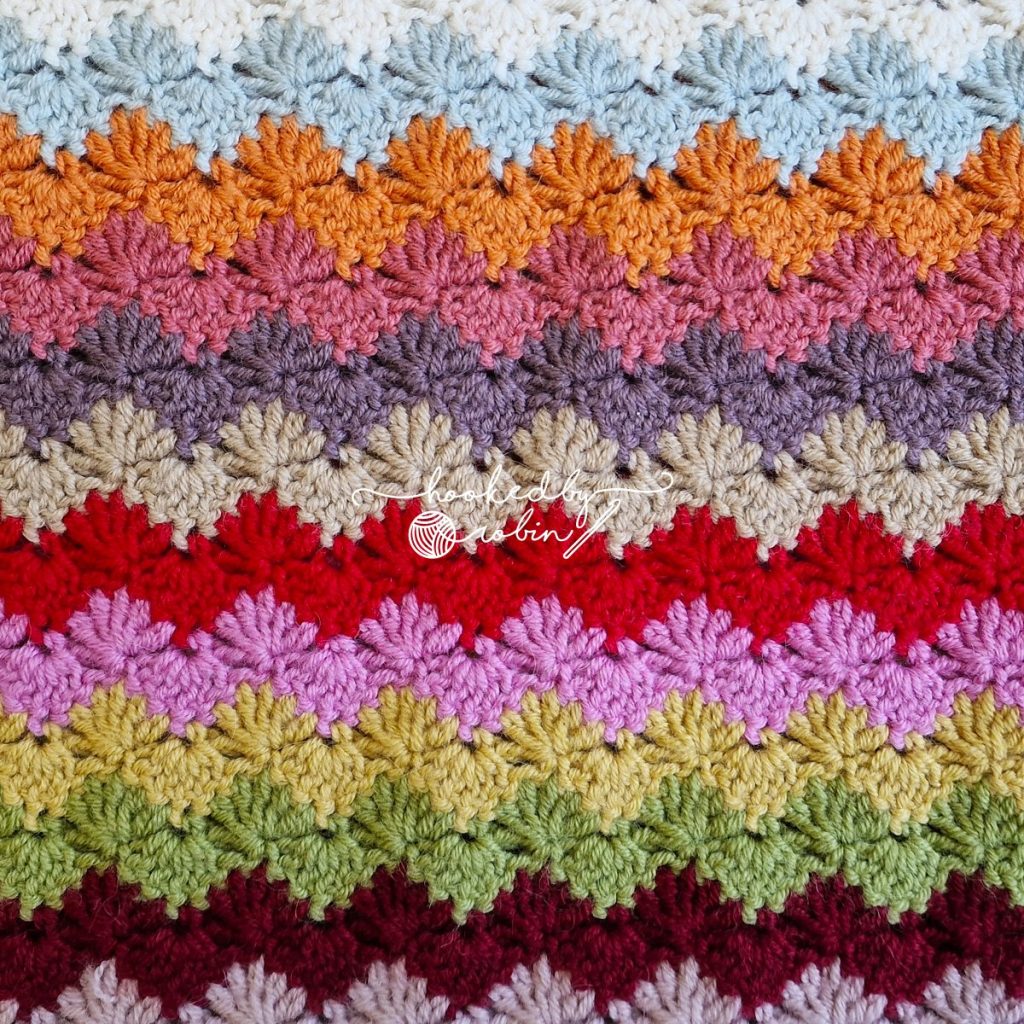
What is the Shell Stitch?
The shell stitch is a decorative crochet stitch characterized by its fan-like appearance, resembling a series of shells aligned together. It consists of multiple double crochets or other taller stitches worked into the same stitch or space, separated by chains or single crochets.
Materials Needed:
Before starting your project, gather the following materials:
- Yarn: Choose a soft and cozy yarn suitable for a blanket. Acrylic or wool blends are popular choices for their durability and washability.
- Crochet Hook: Select a hook size appropriate for your yarn weight. For medium-weight yarn (worsted), a 5.5 mm (I-9) hook is commonly used.
- Scissors: For cutting yarn.
- Yarn Needle: Used for weaving in ends and finishing touches.
- Measuring Tape: Helpful for keeping track of your blanket’s dimensions as you crochet.
Step-by-Step Guide:
1. Foundation Chain:
Begin by creating a foundation chain of the desired length for your blanket. The shell stitch pattern typically requires a multiple of stitches plus a few additional chains for turning.
2. First Row (Set-up Row):
- Row 1: After chaining the desired length, work a set-up row of single crochet (sc) stitches across the foundation chain. This sets the stage for the shell stitches in subsequent rows.
3. Beginning the Shell Stitch:
- Row 2 (First Shell Row): Start by chaining multiple stitches to elevate the row height. This serves as the first double crochet (dc) of your shell stitch pattern.
- Row 3: Skip the next two stitches and work five double crochets into the next stitch (or designated space, as per pattern instructions). This creates the first shell.
4. Repeating the Pattern:
- Rows 4 and Beyond: Continue alternating between a row of single crochets and a row of shell stitches. Each shell stitch row will consist of multiple shells spaced evenly across the previous row of single crochets.
5. Turning and Edging:
- Turning Chains: At the end of each row of shell stitches, chain a few stitches and turn your work before beginning the next row. This maintains the height consistency of your blanket.
- Edging: To finish your blanket, consider adding a simple border of single crochets or a decorative edging that complements the shell stitch pattern. This enhances the blanket’s visual appeal and provides a neat finish.
Tips for Success:
- Consistency: Maintain an even tension throughout your work to ensure uniformity in stitch size and appearance.
- Practice Swatch: Before starting your blanket, practice the shell stitch on a small swatch to familiarize yourself with the pattern and gauge.
- Count Stitches: Count stitches periodically to ensure accuracy, especially when working multiple shells in a row.
Additional Steps and Tips:
Choosing Yarn and Hook Size:
- Yarn Weight: Opt for a yarn weight that suits your desired blanket thickness and warmth. Worsted weight (medium) yarn is versatile and widely used.
- Hook Size: Match your hook size to the yarn weight. A slightly larger hook than recommended can create a softer, more drapey fabric.
Understanding Shell Stitch Variations:
- Shell Stitch Variations: Experiment with variations of the shell stitch. You can vary the number of double crochets in each shell or the spacing between shells for different effects.
- Height and Width: Adjust the height and width of your shells to achieve the desired texture and openness in your blanket.
Managing Yarn Ends:
- Weaving in Ends: As you work, periodically weave in yarn ends to maintain a neat appearance. This reduces the amount of finishing work needed at the end of your project.
Maintaining Consistency:
- Gauge: Check your gauge periodically to ensure your blanket maintains a consistent size throughout. This is especially important if you plan to follow a specific pattern or dimensions.
Pattern Adjustments:
- Customization: Feel free to customize your blanket size and color scheme. You can add stripes, change colors, or incorporate other crochet stitches between shell rows for a unique design.
Blocking Your Blanket:
- Blocking: Once your blanket is complete, consider blocking it to shape and smooth the stitches. This step can enhance the overall appearance and drape of your finished piece.
Troubleshooting Tips:
- Tension Issues: If you notice uneven tension or tight stitches, practice adjusting your hand tension or consider switching to a larger hook size.
- Counting Stitches: Count stitches regularly to avoid errors, especially when transitioning between single crochet rows and shell stitch rows.
Conclusion:
Mastering the shell stitch opens up a world of possibilities for your crochet creations. With patience and practice, you’ll soon find yourself cuddled under a cozy, handcrafted blanket that’s not just warm but also a testament to your newfound skill. Crochet is a journey, and each stitch brings you closer to creating something truly special. Happy crocheting!