Introduction:
Remember those carefree days of childhood when a rainy afternoon or a lazy weekend meant transforming your bedroom into a magical fortress made of blankets, pillows, and sheer imagination? As adults, we might have outgrown many things, but the joy of building a cozy blanket fort remains timeless. It’s not just about reliving childhood memories; it’s also a fun way to unwind, create a private reading nook, or enjoy a movie night with friends and family. So, gather your inner child, round up some household items, and let’s embark on an adventure to construct the ultimate bedroom blanket fort!
Choose Your Fort Location Wisely
The first step in creating your dream blanket fort is selecting the perfect spot in your bedroom. Look for an area with ample floor space that can accommodate your desired fort size. Consider the proximity to power outlets if you plan on using lamps, chargers, or a projector. Also, ensure that there’s enough natural or artificial light during the day and that it doesn’t obstruct any necessary pathways.
Gather Your Fort-Building Materials
To build a sturdy and comfortable fort, you’ll need the following materials:
- Blankets or sheets: The more, the merrier! Large, thick blankets work best for walls and roofs, while sheets can be used for draping and adding a touch of elegance.
- Pillows: For seating, support, and extra coziness.
- Chairs, stools, or tables: These will act as the frame for your fort. Ensure they’re stable and can bear the weight of the blankets.
- Clothespins or clips: To secure blankets to each other or to furniture.
- String lights or fairy lights: For a warm, inviting glow.
- Cushions and bean bags: Extra seating and comfort.
- Rugs or mats: To define the floor space and add warmth.
- Optional: Projector, speakers, books, snacks, and any decorations to personalize your fort.
Design and Construction
Now comes the fun part – designing and constructing your fort! Here’s a basic blueprint:
- Frame Construction: Arrange your chairs, stools, or tables in a rectangular or square shape, leaving enough space for an entrance. If possible, position one piece of furniture against the wall for added stability.
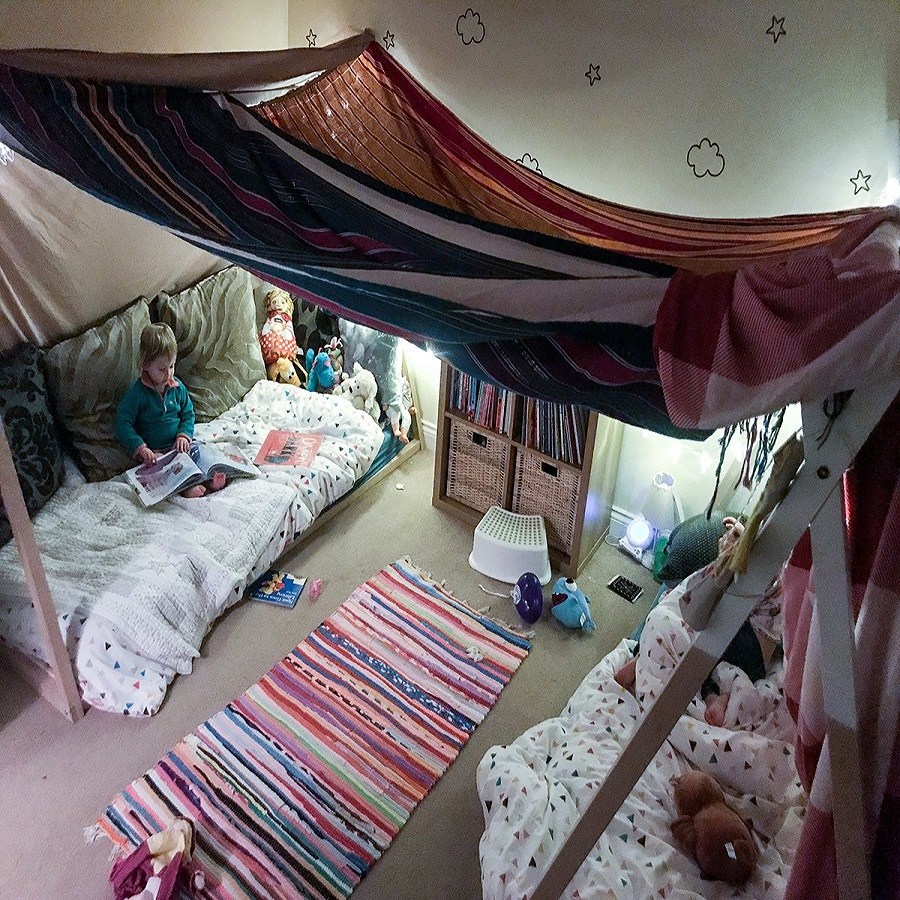
- Roof and Walls: Drape blankets over the top of the frame, securing them to the furniture using clothespins or clips. Make sure to overlap blankets for full coverage. For walls, tie or clip additional blankets between the furniture legs, creating separate rooms or partitions if desired.
- Stabilize and Enhance: Use heavy objects (like books) to weigh down corners and ensure your fort stays put. Add more blankets or sheets for aesthetic appeal and insulation.
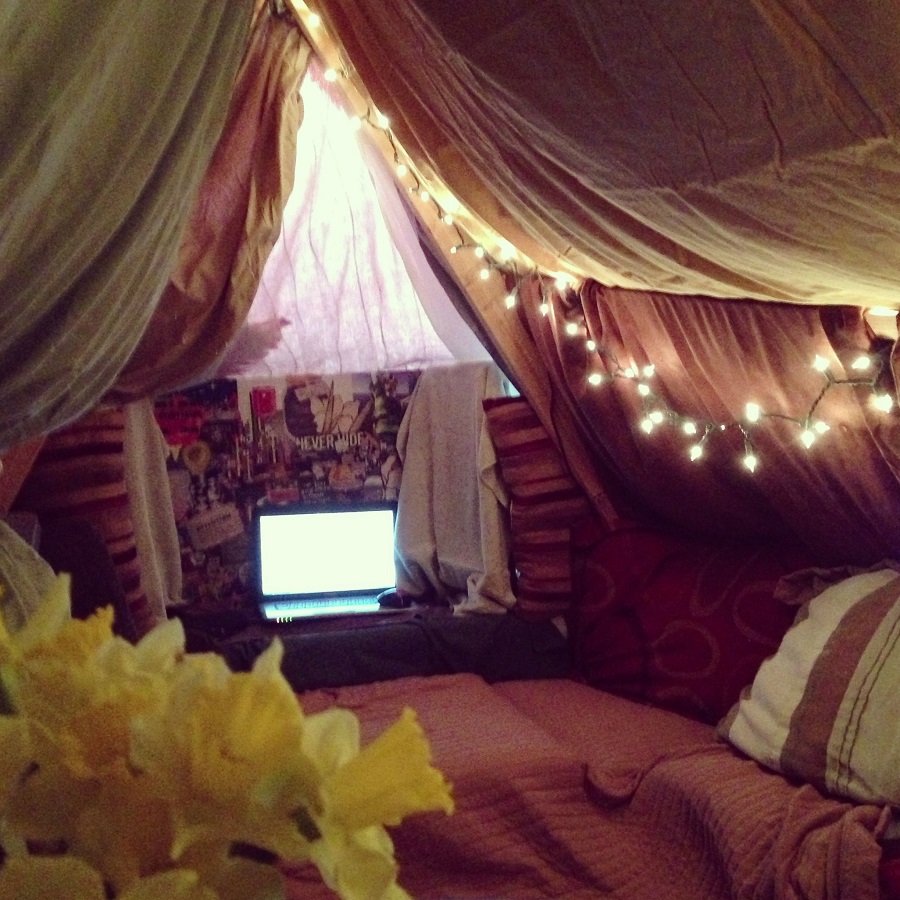
- Interior Design: Arrange pillows for seating and backrests. Scatter cushions and bean bags for added comfort. Roll out a rug or mat to define the floor space. Hang string lights or fairy lights for ambiance.
- Personal Touches: Bring in your favorite books, a Bluetooth speaker for music, a small table for snacks, and any other items that will make your fort feel like home.
Enjoy Your Fort
Once your masterpiece is complete, it’s time to enjoy it! Whether you’re planning a solo escape, a romantic date night, or a fun gathering with friends, your bedroom blanket fort offers a unique and personalized space to relax and unwind.
For Kids:
Let children take the lead in designing their forts, encouraging creativity and problem-solving skills. They might want to add a secret tunnel, a flag on top, or even set up a small play area inside.
For Adults
Adults can elevate the experience by incorporating adult-friendly activities like a wine and cheese night, a movie marathon with a projector, or even a cozy workspace for a change of scenery.
Choose Your Location
The bedroom is an ideal spot for a blanket fort due to its privacy and comfort. Pick a corner or an area near a bed or sofa where you have ample space to build your fort without obstructing the entire room.
Gather Your Materials
To build a sturdy and comfortable fort, gather the following essentials:
- Blankets: Choose a variety of blankets for layering. Sheets or large towels can also work well.
- Pillows: Lots of pillows for seating and comfort inside the fort.
- Chairs or Furniture: Use chairs, tables, or sofas to anchor your blanket fort structure.
- Clips or Clothespins: These will help secure blankets to furniture.
- Flashlights or String Lights: For interior lighting and ambiance.
- Optional Decorations: Stuffed animals, cushions, and any other decorative items to personalize your fort.
Plan Your Design
Before you start building, consider the type of fort you want to create:
- Simple A-Frame: Use chairs or a table to support blankets draped in an A-shape.
- Tunnel Fort: Create tunnels and rooms by draping blankets over furniture arranged in a square or circular layout.
- Multi-Room Fort: Utilize multiple chairs and tables to create separate rooms within your fort.
Construct Your Fort
Now it’s time to build! Follow these steps to construct your ultimate blanket fort:
- Anchor Your Base: Start with the largest pieces of furniture like chairs or sofas to anchor your blankets. These will form the corners and support the structure.
- Drape Blankets: Begin draping blankets over the furniture to form walls and a roof. Use heavier blankets for the roof to create a sturdy structure.
- Secure with Clips: Use clips or clothespins to secure blankets together and to furniture. Ensure everything is snug but not too tight to avoid pulling down the structure.
- Create Entryways: Leave openings for doorways and crawl spaces. You can use extra blankets draped over chairs as curtains or door flaps.
- Add Interior Comfort: Place pillows, cushions, and soft blankets inside the fort for seating and lounging.
- Decorate: Add personal touches like string lights, stuffed animals, or favorite toys to make the fort cozy and inviting.
Enjoy Your Fort
Once your blanket fort is complete, it’s time to enjoy your cozy hideaway! Here are some activities to do inside your fort:
- Read Books: Bring in some books and read alone or with friends and family.
- Watch Movies: Set up a tablet or small screen inside for a movie marathon.
- Play Games: Bring in board games or card games for entertainment.
- Have Snacks: Bring in snacks and drinks for a cozy snack time inside the fort.
- Sleepover Fun: If you’re building the fort with friends, consider having a sleepover inside your creation.
Maintenance and Cleanup
Blanket forts are meant to be temporary structures, so be prepared to dismantle and clean up afterward. Fold blankets neatly and return furniture to its original place. Store materials for future building sessions, or keep the fort intact for another day of fun.

Plan Your Fort Layout
Before diving into the fun, sketch out a rough plan for your blanket fort. Consider the available space, furniture pieces you can utilize (like chairs, tables, or the bed), and how you want the fort to function. Are you looking for a private reading nook, a movie-watching den, or a serene spot for meditation? The layout should accommodate your intended activities while ensuring easy access and ample ventilation.
Gather Materials
To construct your dreamy fort, you’ll need:
- Blankets or sheets: Opt for soft, thick materials that can drape beautifully and provide insulation.
- Pillows: A mix of sizes for seating, back support, and added coziness.
- Fairy lights or string lights: For a warm, magical glow inside your fort.
- Cushions and throws: Extra layers for comfort and texture.
- Support structures: Chairs, stools, or even tension rods if you prefer a more structured approach.
- Clamps or clothespins: To secure blankets in place without damaging them.
- Optional: A portable speaker for music, a small table for snacks, or a projector for movies.
Assemble Your Fort
With your materials ready, it’s time to build:
- Create the Frame: Arrange your furniture to form the base structure of your fort. Drape blankets over the top, securing them at the corners and along the sides using clamps or tying them to the furniture legs. Use tension rods or extra-long blankets to create tunnels or partitions if desired.
- Layer for Comfort: Pile on pillows and cushions for seating and lounging. Drape throws over edges and within the fort for added softness and color.
- Light It Up: String fairy lights around the interior perimeter, weaving them between blankets and drapes. The soft lighting will instantly elevate the ambiance, making your fort feel magical.
Conclusion:
Building a bedroom blanket fort is a delightful activity that transcends age barriers. It’s a creative outlet, a stress reliever, and a reminder that sometimes the simplest joys in life are the most fulfilling. So, whether you’re young at heart or simply looking for a whimsical escape from the everyday, embrace the magic of blanket forts and let your imagination soar. Happy fort-building!