Introduction:
Diy bed skirt – Transforming your bedroom into a sanctuary of elegance and charm doesn’t have to break the bank. One simple yet impactful way to elevate the look of your sleeping space is by adding a dreamy bed skirt. Bed skirts not only hide unsightly bed frames and under-bed storage but also add an air of sophistication and completeness to your bedroom decor. In this comprehensive guide, we’ll walk you through the process of creating your very own DIY bed skirt, tailored to your personal taste and style preferences.

Materials You Will Need:
- Fabric: Choose a fabric that complements your bedroom’s color scheme and texture. Opt for lightweight materials like cotton, chiffon, or linen for a dreamy, ethereal look.
- Measuring Tape: Accurate measurements are key to a well-fitting bed skirt.
- Scissors: Sharp fabric scissors ensure clean cuts.
- Sewing Machine: For缝合 seams and hems.
- Thread: Matching the color of your fabric.
- Pins: To hold fabric in place while sewing.
- Iron: To press hems and seams for a professional finish.
- Fabric Glue (Optional): If you prefer a no-sew method.
- Bed Skirt Panels or Fabric for Platform (if not using the traditional gathered method).
- Velcro Strips or Curtain Clips: For attaching the skirt to the bed frame.
Measure Your Bed
Begin by measuring the length and width of your bed, including the height from the floor to the top of the box spring or mattress. This will help determine how much fabric you need and the dimensions for each section of the bed skirt.
Calculate Fabric Requirements
Using your measurements, calculate the total amount of fabric required. For a gathered look, multiply the perimeter of the bed (twice the length plus twice the width) by 1.5 times for fullness. Don’t forget to include additional inches for hems and seam allowances.
Cutting the Fabric
Lay out your fabric and carefully cut it according to your calculations. If you’re making a three-panel bed skirt (one for each side and one for the foot), divide the total length of fabric accordingly. Remember to add extra fabric at the top for attaching the skirt to the bed.
Hemming and Finishing Touches
Fold the bottom edge of each fabric panel twice (about 0.5 inch each fold) and sew a straight stitch to create a neat hem. Repeat this process for the sides if necessary. If you’re using fabric glue, apply it following the manufacturer’s instructions for a no-sew alternative.
Attaching the Bed Skirt
There are several methods to attach your bed skirt:
- Traditional Method: Sew a wide hem at the top of each panel and insert elastic or create buttonholes to secure it under the mattress.
- Velcro Method: Sew Velcro strips to the top of the skirt panels and attach corresponding strips to the bed frame or box spring.
- Curtain Clip Method: Fold the top of each panel over a curtain clip and attach the clips to the bed frame.
Finishing Touches and Customizations
To truly personalize your bed skirt, consider adding lace trims, embroidery, or even pintucks. These small details can significantly enhance the overall aesthetic of your creation.
Installation and Enjoyment
Carefully attach your newly crafted bed skirt to your bed, ensuring it hangs evenly all around. Step back and admire your handiwork – your bedroom now boasts a touch of elegance and personality that store-bought items often lack.

Materials You’ll Need:
Before diving into the creative process, gather these essential materials:
- Fabric: Choose a fabric that complements your room’s decor. Cotton, linen, or a blend works well for its durability and ease of washing. Consider the color, pattern, and texture that suits your aesthetic.
- Measuring Tape: Accurate measurements are crucial for a tailored fit.
- Scissors: Sharp fabric scissors for clean cuts.
- Sewing Machine or Fabric Glue: For sewing enthusiasts, a sewing machine is ideal. Alternatively, fabric glue is a no-sew solution.
- Straight Pins: To hold fabric in place before sewing or gluing.
- Iron: To press the fabric for a professional finish.
- Elastic Bands or Velcro Strips: These will help secure the bed skirt to the box spring.
DIY Method 1: The Classic Sewn Bed Skirt
Measure Your Bed
Measure the length and width of your bed, including the height from the top of the box spring to the floor. Add a few inches to each measurement for hems and overlapping edges.
Cut the Fabric
Cut the fabric into three pieces: two for the sides and one for the foot (or head) of the bed. The side panels should be the height of your drop plus twice the depth of your mattress for an overlap. The foot panel should match the width of your bed plus hem allowances.
Hem the Edges
Fold the edges over twice to create neat hems and sew them in place or apply fabric glue, pressing firmly with an iron to set.
Attach the Panels
Attach the side panels to the foot panel using straight pins or fabric glue, leaving the top edge open for attaching to the box spring. Sew or glue along the pinned edges.
Secure to the Bed
Attach elastic bands or sewn-in loops to the top edge of the bed skirt, spacing them evenly. Slide the elastic over the corners and sides of the box spring or use Velcro strips to attach the skirt directly to the box spring.
DIY Method 2: The No-Sew Alternative
For those who prefer not to sew, this method uses fabric glue and Velcro strips for a quick and easy bed skirt.
Step 1 & 2:
Follow the measuring and cutting steps as mentioned above.
Step 3: Glue Hems
Instead of sewing, use fabric glue to create neat hems on all sides of the fabric pieces. Allow the glue to dry completely according to the manufacturer’s instructions.
Step 4: Assemble
Lay out the panels as described in Method 1, overlapping the edges where necessary. Apply glue between the overlapping sections and press firmly until secured.
Step 5: Attach to Bed
Cut Velcro strips to fit along the top edge of the bed skirt and the corresponding spots on the box spring. Attach one side of the Velcro to the fabric and the other to the box spring, then simply press together to secure the bed skirt in place.
Design Tips and Variations:
- Pattern Play: Mix and match patterns for a playful touch. Coordinate your bed skirt with throw pillows or curtains for a cohesive look.
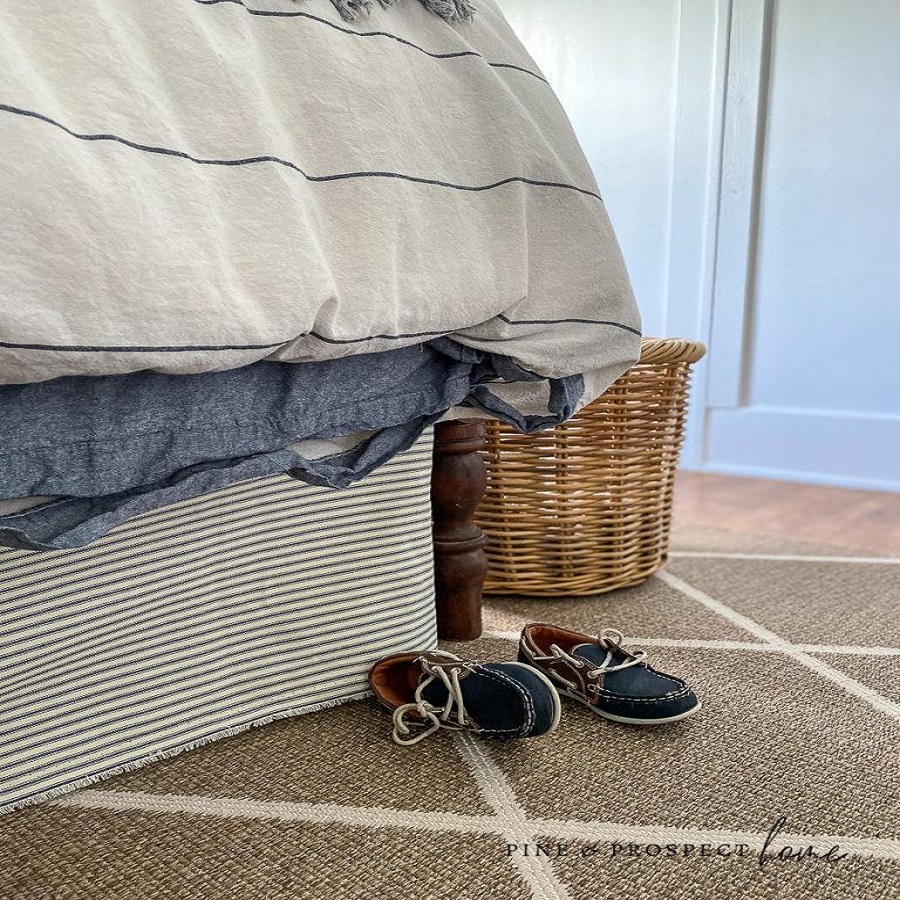
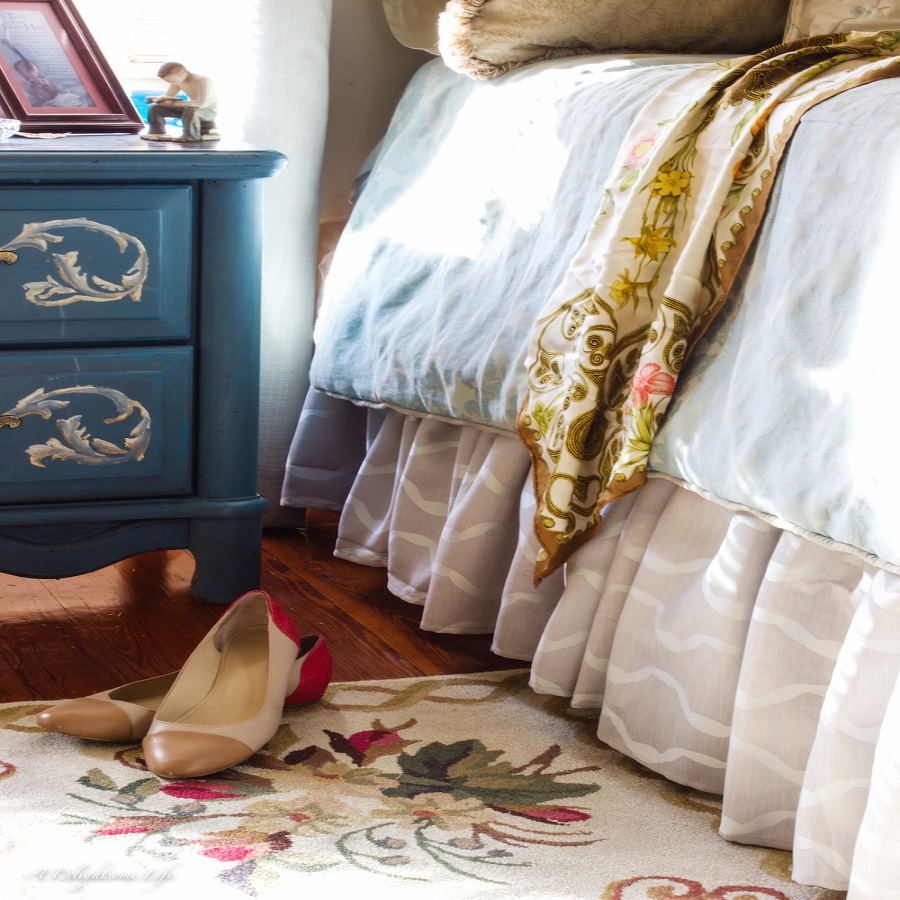
- Ruffled Effect: For a more romantic feel, create ruffles by gathering the fabric before attaching it to the top edge. Use more fabric than necessary for each panel and sew or glue along the gathered edge.
- Color Blocking: Use different fabrics for each section of the bed skirt to add visual interest and depth.
Attach the Fabric to the Fitted Sheet
Lay the fitted sheet flat on the floor, wrong side up. Position the fabric skirt over it, aligning the edges as desired. You can either attach the fabric directly to the sheet using fabric glue, starting from the top edge and working your way down in sections, or use safety pins along the top edge for a temporary attachment that allows for easy removal and washing.
If you’re using command hooks, attach them evenly around the perimeter of the box spring, under where the fitted sheet will sit. Then, sew or glue loops of fabric (made from scraps or ribbon) to the top edge of the fabric skirt, which can be hooked onto the command hooks later.
Conclusion:
Creating a DIY dreamy bed skirt not only adds a touch of sophistication to your bedroom but also serves as a testament to your creativity and craftsmanship. By following these step-by-step instructions, you’ve transformed your sleeping space into a personal haven that reflects your unique style. Now, snuggle up under your covers, surrounded by the elegance you’ve so skillfully crafted. Sweet dreams!